
Desktop UI - Building a Homescreen, part 1
An ICE homescreen acts as a landing page for the immersive space and presents the user with commonly used shortcuts such as recent sessions, favourite content and integrated applications. It also provides an opportunity for branding the Igloo with custom graphics and styling preferences.
Tutorial Video
Building a Homescreen
Adding a Home layer
The first step is to add a special Home layer to the layer list in ICE.
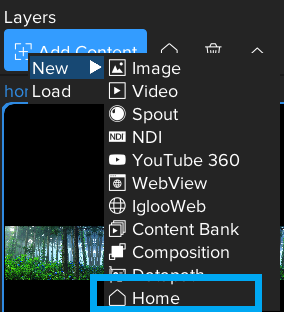
Press the Add Content button and select New > Home.
A new layer is added called ‘Home’, which is also a pinned layer.
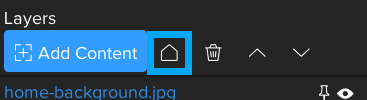
Press the icon to the right of the Add Content button which looks like the outline of a house.
This is the Home icon and it returns the user back to the homescreen. In fact, the button causes all un-pinned layers to be removed from the layer list and the Home layer is moved to the top of the layer list.
Layouts and Components
The homescreen may consist of multiple layouts, each of which presents a set of components.
By default, we have one layout called ‘Untitled Layout’. In the Layout tab of the Home layer properties, change the name to ‘MyLayout’.
To add a component, press the '+' button at the bottom of the Layout tab. This will display a popup menu of component types. Select the Text type.
This will draw the word ‘text’ in the top left corner of the Home layer. Click on the Component tab and change the Text field to say ‘Welcome to ICE’. Use the X and Y position sliders to move the text into the upper centre of the Home layer.
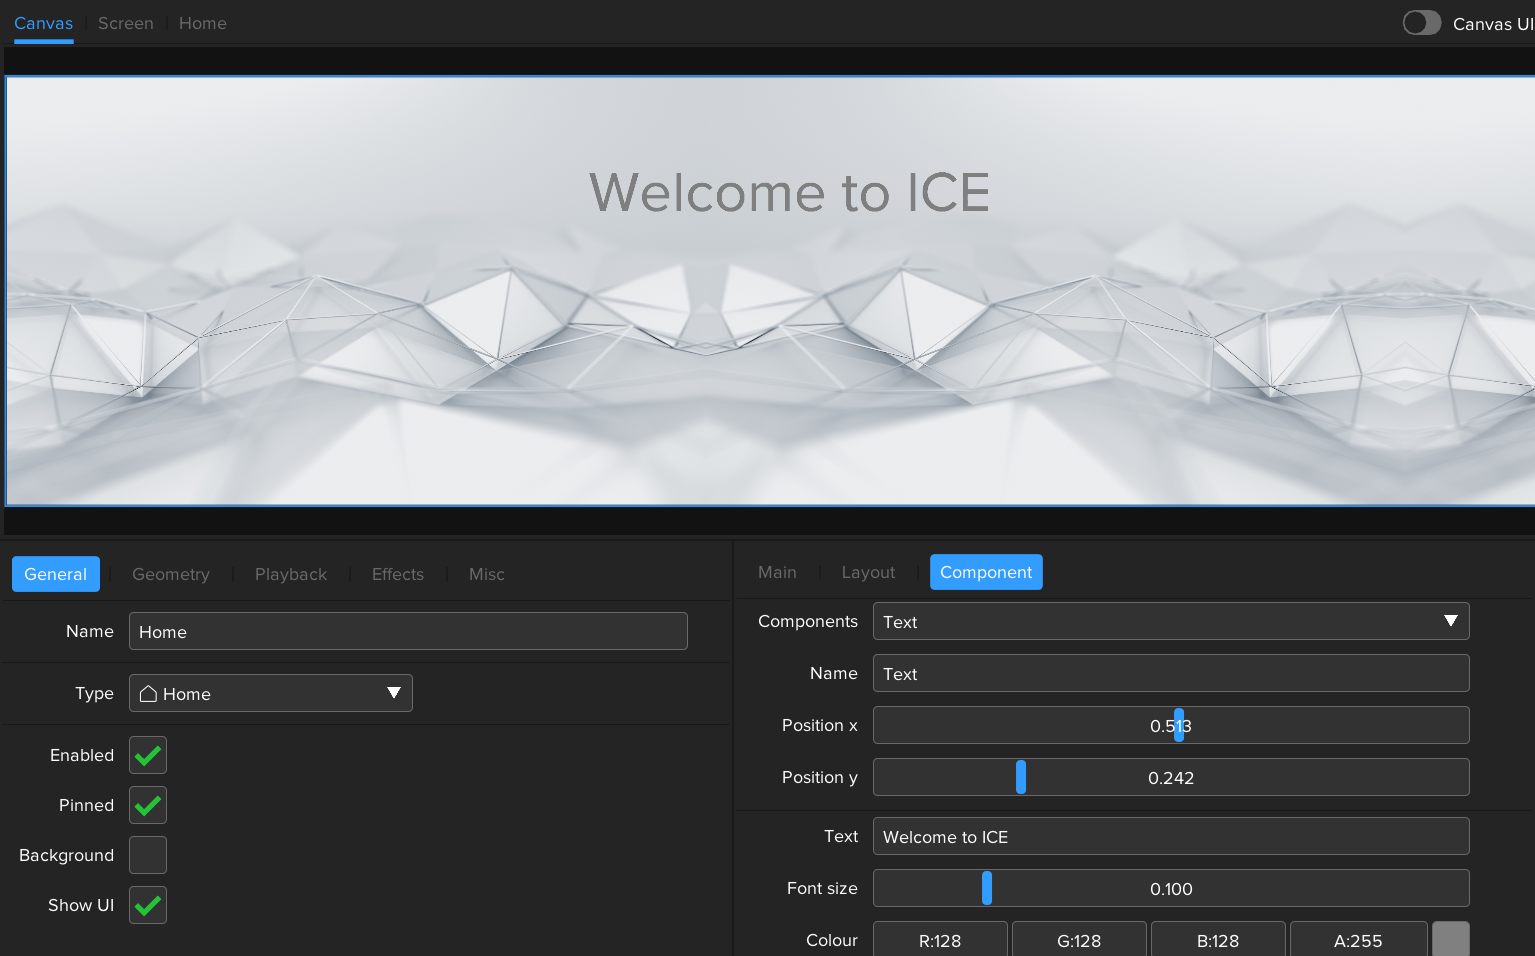
Home layer with text component
Session Grids
Return to the Layout tab and press the ‘+' button. Select Grid from the popup menu. On the Component tab, set the name to be SessionGrid and set the title to be 'Recent Sessions’. Use the position sliders and width, height sliders so that the grid appears to the left of the Welcome text.
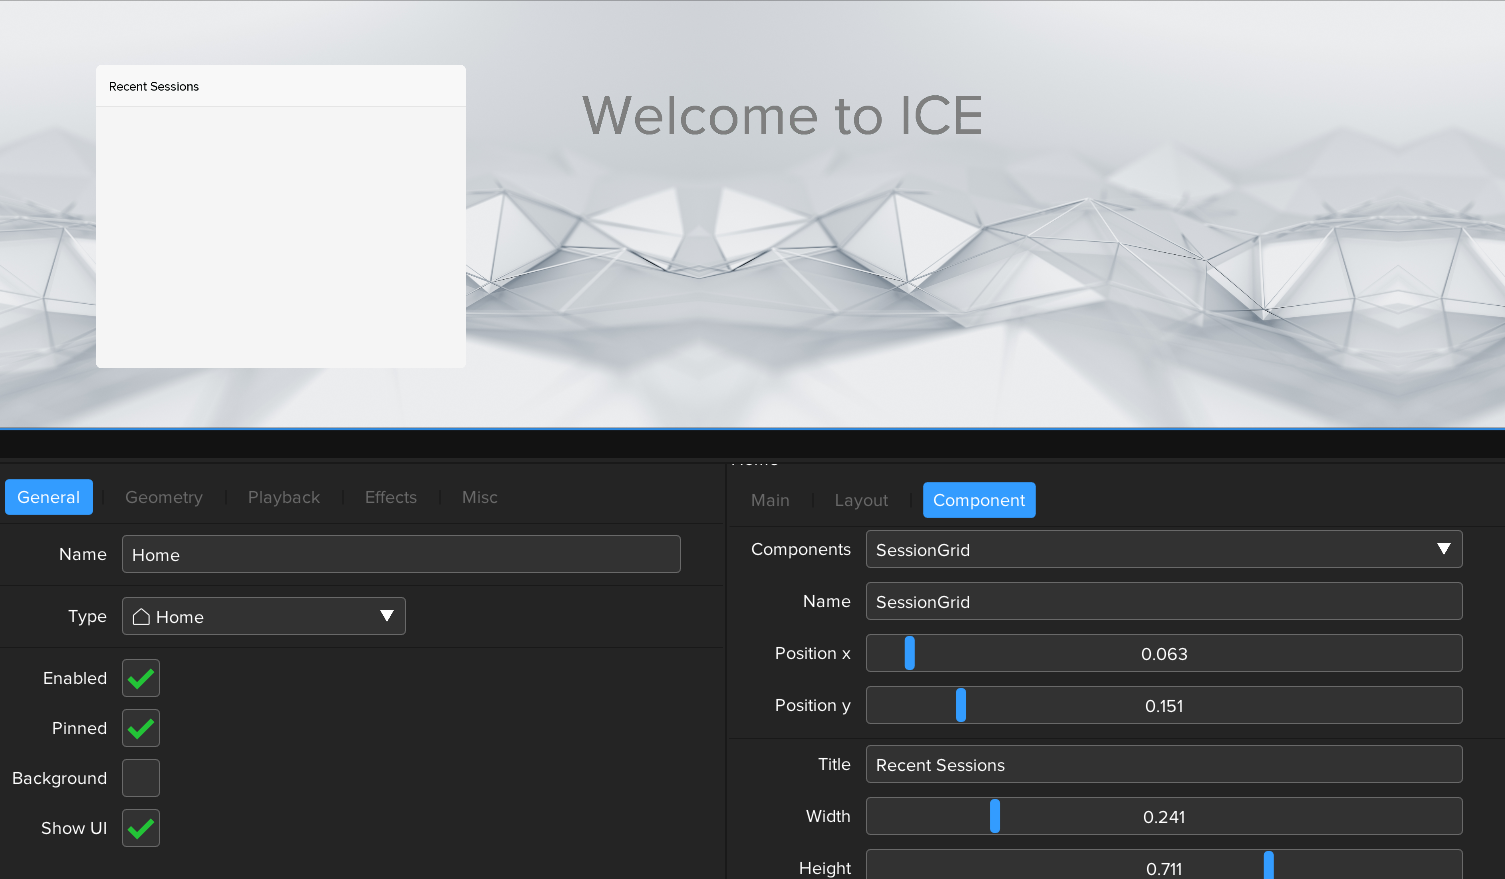
Scaling and positioning the Sessions grid
Scroll to the bottom of the Component tab and select Recent from the Fill type dropdown list. This will populate the grid with the most recently saved sessions. There is a limit value called Max Sessions to determine how many recent sessions to display.
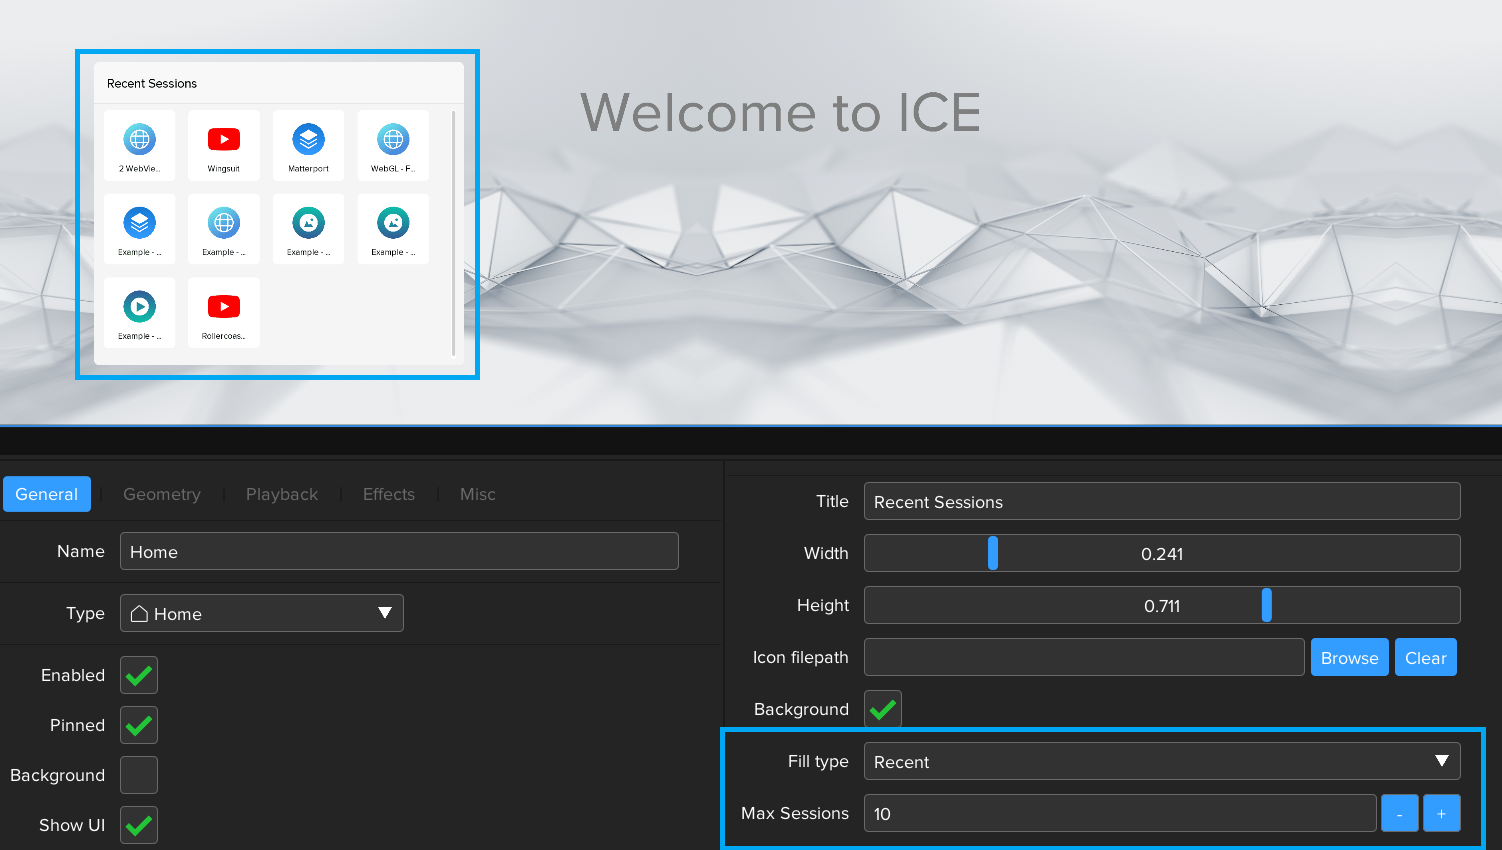
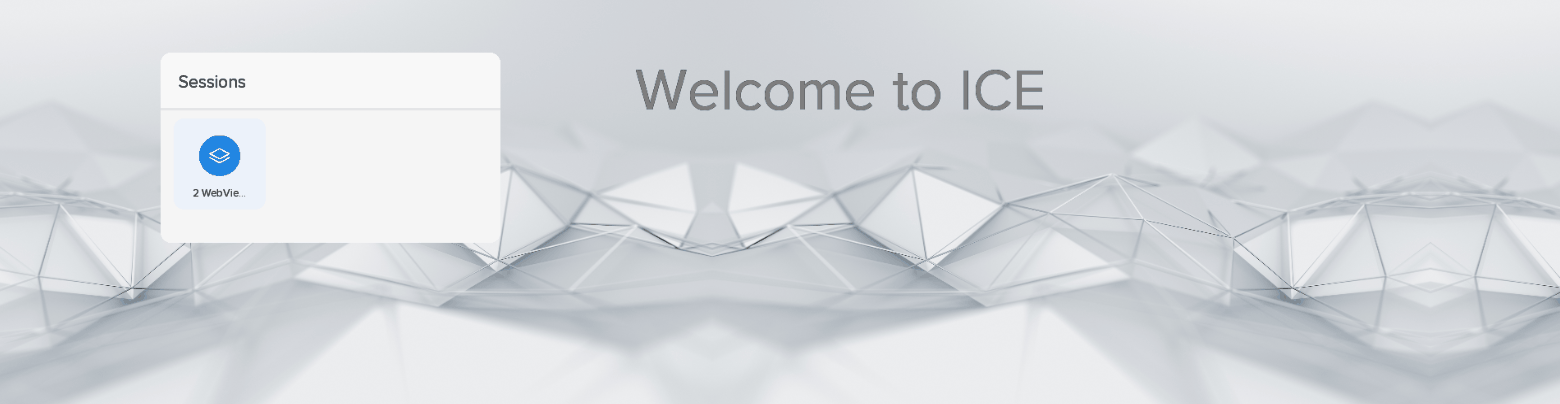
Session grid populated with Recent sessions
The SessionGrid on the Home layer is now populated with the most recent session icon shown in the top-left position. Notice if it shows the ‘2 WebViews’ session from the previous tutorial.
Launching a Session
To allow interaction with the Home layer, the Canvas user interface must be enabled.

In the top-right corner of the ICE desktop window, click the Canvas UI switch to on.
In the Canvas preview, move the mouse over the Home layer and click on the 2 WebViews session icon.
This automatically loads the 2 WebViews session into the layer list and hides the Home layer. To go back to the Home layer, press the Home icon on either the Canvas toolbar (as shown below) or on the desktop UI (next to the Add Content button).
We will continue with the Home layer in the next tutorial to explore the other component types.
See Home - ICE Documentation for more further details on Home Layer configuration
Next Session: Desktop UI - Building a Homescreen, part 2