
Google Street View
The Igloo Streetview Service enables viewing of Google Street View panoramas in an immersive space.
Requirements
A Google Street View API key is required for this service.
Overview
Panorama mode allows movement between Street View panoramas with a map, or by manipulating a standard Street View panorama viewer.
Route mode gives users the ability to create journeys, equivalent to standard Google Maps Directions routes, and automatically travel along them within an immersive environment.
Slideshow mode provides utilities to create a Street View panorama slideshow, and automatically display it - just like a PowerPoint slideshow.
Single-frame views allow use of Street View and Google Maps content in non-360° modes (i.e. a single wall of an immersive room used to display a map or Street View panorama frame without using all four walls).
There’s also a favourites system for panoramas, routes, and slideshows, as well as easy support for immersive panorama viewing on <360° projection surfaces - and a one-click integration with any standard Google Maps session in a browser.
Streetview session
A Streetview session is included in the example ICE database. This consists of a single layer giving a full canvas view of the current Streetview location. Navigation can then be made using the app in ICE Control Panel.
Streetview Layer in ICE.
ICE Control Panel App
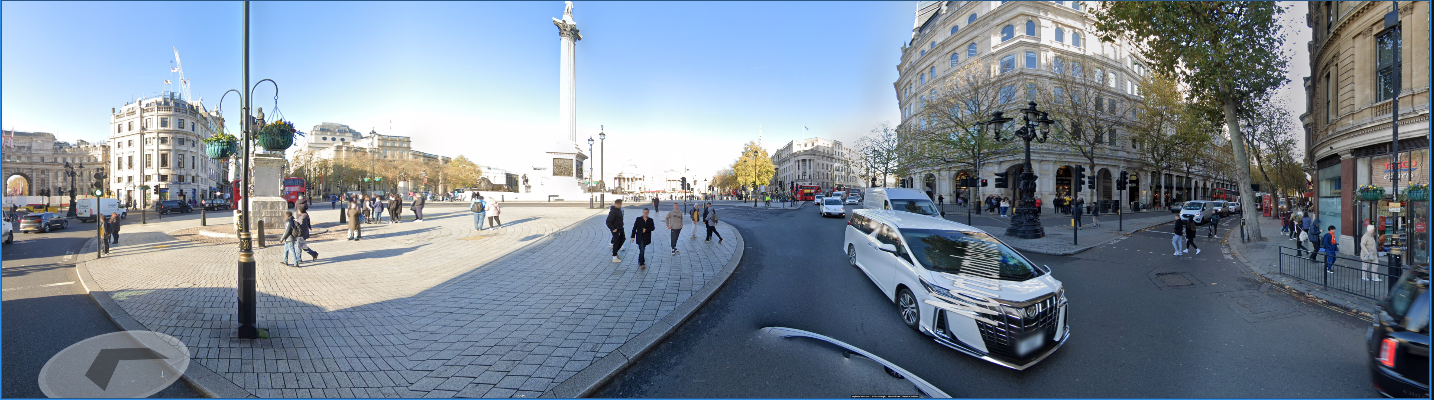
The control page allows easy movement between different Street View panoramas. It’s accessible at http://localhost:800/streetview/control/ in Chrome, or at the same port/page on mobile devices using the media server’s local IP (e.g. http://10.0.0.1:800/streetview/control/). You can use the Mobile link in the page’s Settings menu to easily access the mobile control view using a QR code - see the Settings section below.
You can use the viewport in the top half of the page as for normal Street View usage, and every page will synchronise with any movement made on any other page.
In panorama mode, you can also click the map to be taken to a panorama at that location. The map otherwise acts like a standard Google Map (drag the mouse to move around, scroll/pinch to zoom in, etc.)
See below for more information about other modes.

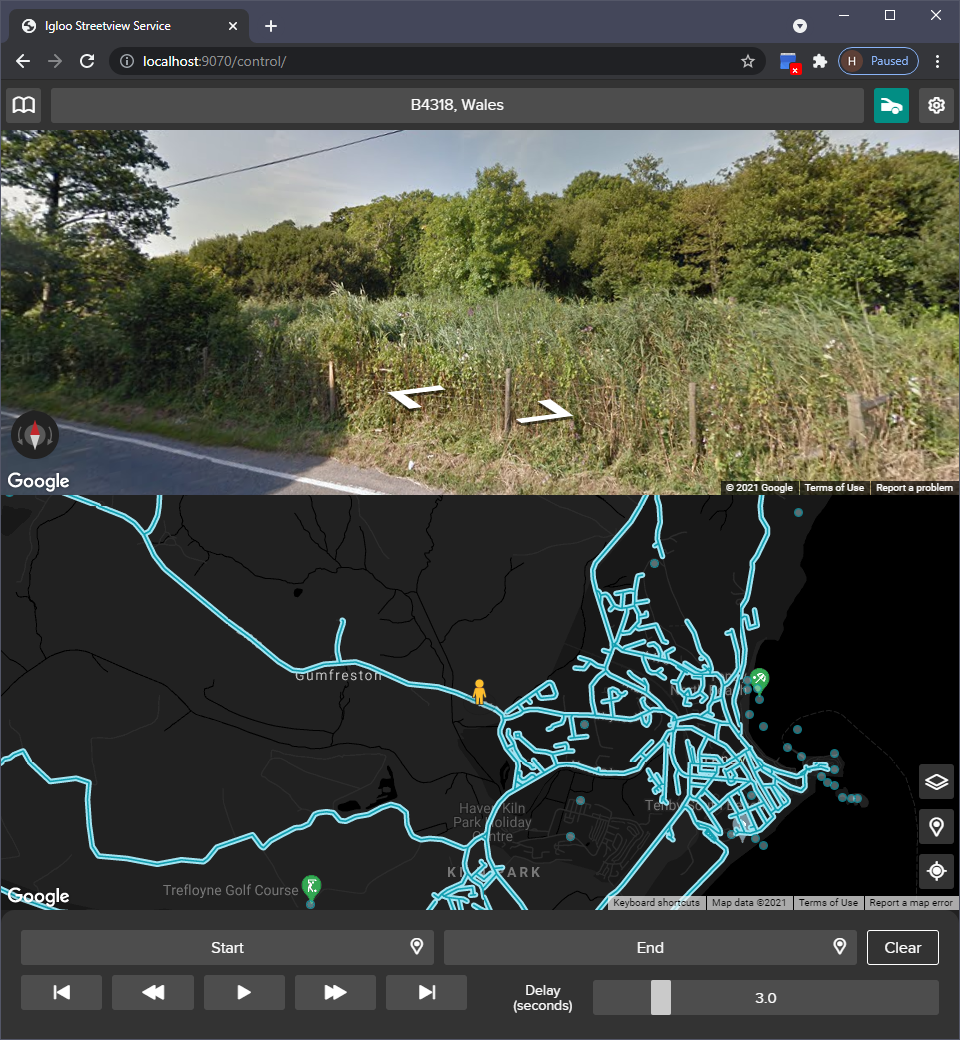
Streetview Control page.
Favourites
Click the 📖 icon to open/close the favourites menu.
This menu changes based on the current mode, allowing you to save routes and slideshows as well as panoramas.
See the sections further down this page for full information about different modes.
In all modes, clicking a folder in this menu will open that folder, showing you the items it contains. To get back out of a folder, click the back arrow in the top left of the menu.
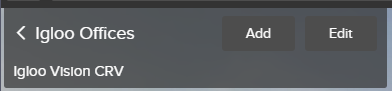
In panorama mode (displayed above), click the Add button to add a panorama to your favourites list.
In panorama mode, clicking a saved panorama in this menu will take you to that panorama.
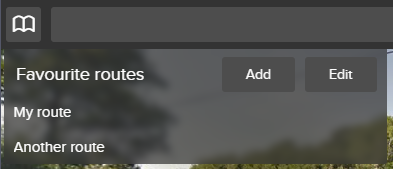
In route mode (displayed in the above image), clicking an entry will load that route, allowing it to be replayed.
In slideshow mode, clicking an entry will load that slideshow, allowing it to be re-used.
When saving a route or slideshow, you are saving a snapshot of the current route/slideshow that is being displayed by that mode. Any changes made after saving or loading a route/slideshow are not automatically saved. This is reflected by the altered save icon in these modes.
Editing the favourites menu
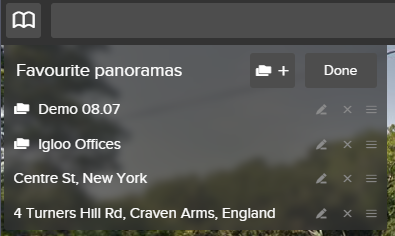
Pressing the Edit button in the top right of the menu enters edit mode, resulting in some additional icons within the menu.

The pencil icon renames a favourite item or a folder - a dialogue box will open for you type in a new name.
The ❌ icon deletes a favourite item or folder - if it’s a folder, the entire folder and its contents will be deleted.
The ☰ icon is a drag handle. It allows re-organisation of the favourites menu.
Click and drag the drag handle to pick an item up, then drop it to move it to the location indicated.
A white line will show the destination of the item if moving within a list
If you drop an item on top of a folder, it will be moved into that folder - this is indicated by the background colour of the destination folder.
To move an item out of a folder, drop it on top of the back arrow in the top left of the menu
The favourites menu will autoscroll if required when dragging an item around
Press the new folder icon in the top right of the menu to create a new folder
Press Done to leave edit mode.
Search
This box displays the address of the currently displayed panorama, and also acts as a search box - start typing in the box to see autocompleted place suggestions.
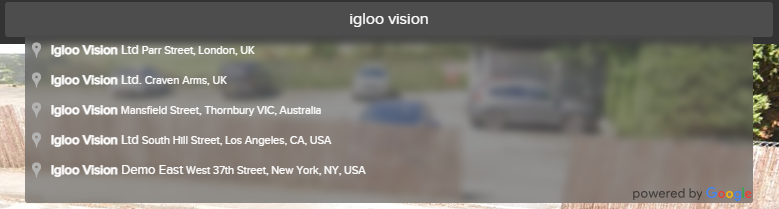
Selecting an item from this list will find a panorama close to the selected location to display.
This box has an additional function in Slideshow mode (described below).
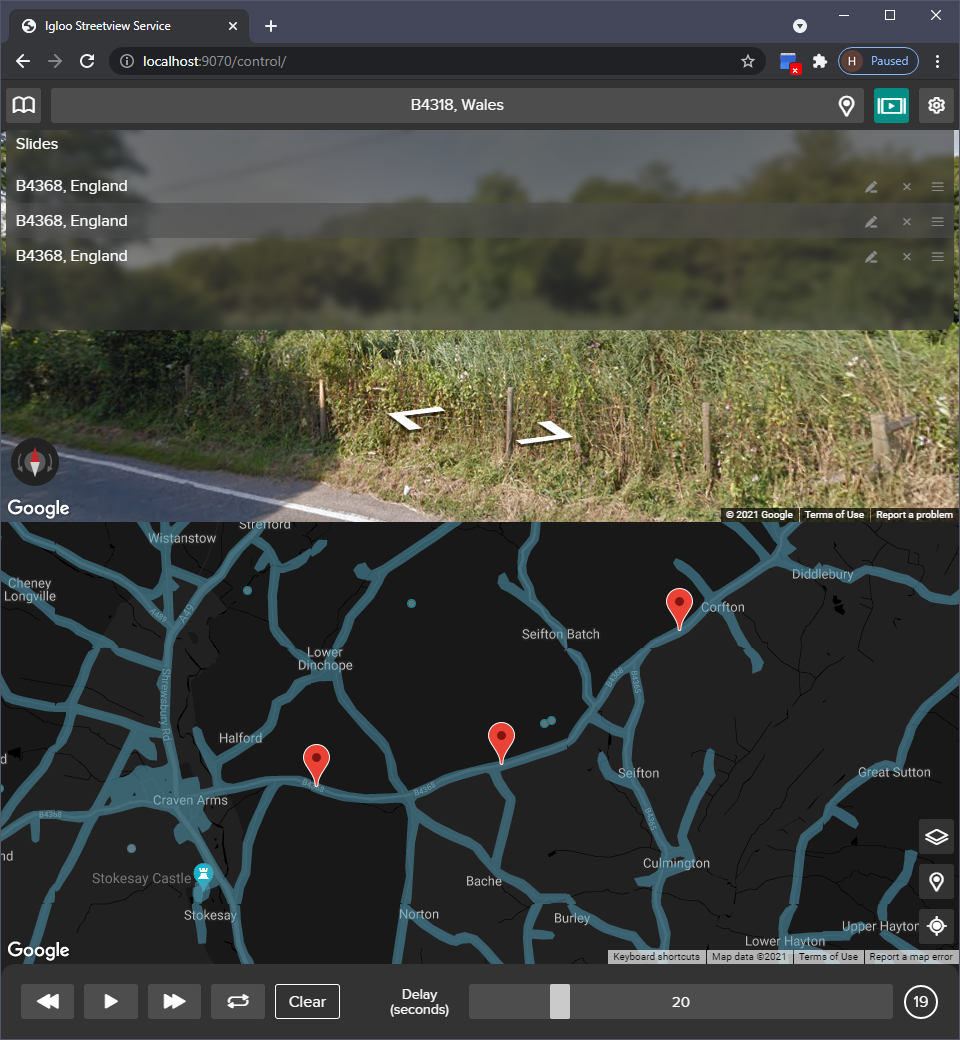
Press this button to open a dropdown menu which will allow you to switch between modes. You can do this by pressing the relevant icon - the 🗺️ represents the standard panorama mode, which allows you to navigate between panoramas by clicking the map or within the viewport.

The 🚗, 🚶, and 🚲 icons represent Route mode, using directions from the displayed type of transportation.
The 🎞️ icon represents slideshow mode.
See the sections further down this page for more details about modes.
Settings
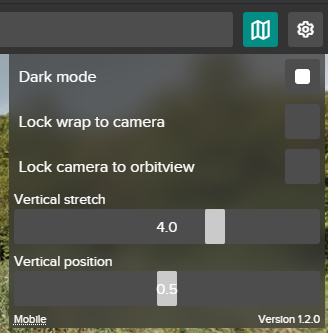
Click the ⚙️ to open/close the menu.
The dark mode option changes the colour mode of the user interface and map. This is synchronised between other pages, including open mapview pages.
The Lock wrap to camera option allows camera movements within the Street View panorama in the top half of the page to control the orientation of the equirectangular image generated by Igloo Web.
With wrap locked, the image on the Igloo canvas will rotate horizontally (wrap) with camera movements, allowing users with <360° screens to easily bring other parts of the panorama into view by rotating the control page’s viewer to show the desired image.
Lock camera to Orbitview causes any connected orbitview viewers to mimic all camera movements made in the panorama viewer on the control page.
Vertical stretch adjusts the vertical scale of the resulting image on the Igloo canvas - increasing this value makes objects appear taller, and shows a smaller vertical proportion of the panorama (and vice versa for decreases in this value).
Vertical position adjusts the position of the resulting image on the Igloo canvas - increasing this value moves the image up on the canvas, showing more of the ground. Decreasing this value moves the image down on the canvas, showing more of the sky.
The bottom right of the menu shows the current version number.
The Mobile link in the bottom left of the menu will open a pop-up that contains a QR code, which can be scanned on a mobile device to quickly access the control page without worrying about finding and typing out the media server’s IP.
Map type

Click this button to open a dropdown that displays the available map types.
All changes made within this menu apply to any connected mapview pages.
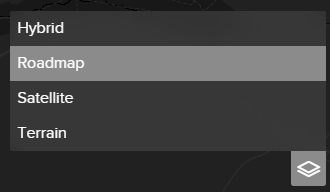
Click a map type in this dropdown to change the displayed map type.
Places menu

Click this button to open a dropdown to filter the places shown on the map.
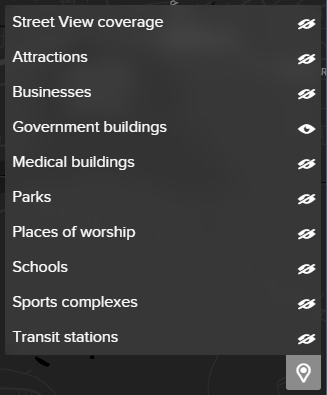
Click an entry to toggle the map visibility of places in the relevant category. The 👁 icon shows the current visibility of that category.
Any changes made within this menu synchronise with connected mapview pages.
Recentre button

Click this button to recentre the map on the currently displayed panorama.
Route mode
v
Route mode allows you to create a route to travel along. This is exactly the same as getting route directions using Google Maps - we then automatically travel along the route by visiting panoramas along its path.
Driving/walking/cycling directions
Clicking these buttons changes the route’s mode of transportation. This is equivalent to selecting driving/walking/cycling directions when planning a route with standard Google Maps. This is useful if you want to travel along a footpath or similar.
You can switch between modes of transportation at any time, including after a route has been created - i.e. clicking the walking directions button at that point will rebuild the route using walking directions.
Adjust the route’s mode of transportation also dictates how many panoramas will be visited as it progresses - more panoramas are visited in walking mode than in driving mode, for example.
Creating a route

You can type locations into the Start and End searchboxes to define a route. A blue line will appear on the map to reflect this, as shown on the right.
You can also use the map-pin button on the right hand side of the searchbox to use the current panorama as the start/end location. (i.e, go to your desired start/end location and press the button to set it as the start/end point for the route).
Once you have a route in place, you can fine-tune it by interacting with the blue line on the map:
You can drag the line from anywhere to adjust the route to take between the start/end points
You can also drag the red A/B markers to change the start and end locations.

Pressing the Clear button removes the current route entirely.
Playing the route

Once you’re happy with your route, pressing the play button will start the journey. The ⏪/⏩ buttons advance manually through individual sweeps, and the ⏮/⏭ buttons skip to the start/end of the route respectively.
When a route is playing, the play button acts as a pause button, which can be pressed at any time to stop automatically advancing panoramas.
You can switch between modes at any time while a route is playing, and return to the route as it was when switching back to route mode.
While playing a route, the panorama viewer on the control page will automatically orientate its camera to look towards the next panorama that will be visited.
This camera orientation change can also be synchronised with Orbitview, using the Sync menu described in the Overview above. The same is true for locking camera rotation to the Warper, but this is probably undesirable.
Route parameters

The delay slider adjusts the time to wait at each panorama along a route. Increase this value to spend more time in each panorama, or decrease it to spend less.
Saving a route
See the “Favourites” section in the Overview above for details about saving routes.
Route parameters are not saved with routes.
Slideshow mode
Slideshow mode creates a slideshow from a selection of panoramas. You can cycle through slides on a pre-set timer, manually advance slides, or visit a specific slide.
Creating a slideshow

Add panoramas using the map-pin button at the right hand side of the search box (see above):
Go to the panorama you’d like to add, by using the map or searching.
Click the button to add it to the slideshow.
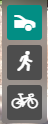
When you add a slide, it will appear in the list at the top of the screen, as shown on the right.
Slide locations are displayed on the map with the red location markers, as shown on the right.
Playing the slideshow

Press the play button to start advancing through the slideshow.
The loop (🔁) button is a toggle, and behaves like a standard loop button in music players - toggling it on means that when the slideshow is over, it will start again from the start.
You can pause playback at any time by pressing the play button (which will display a pause icon when the slideshow is playing).
You can manually advance through slides using the ⏪/⏩ buttons, or click on a specific slide in the list at the top of the screen to show it.
The current slide will be highlighted in the list of the slides at the top of the screen.
The Clear button removes all slides from the current slideshow.
Slideshow parameters

This slider adjusts the amount of time that is spent at each slide of the slideshow.
The circle on the right is a countdown timer; it’ll display the time remaining at each slide.
Editing the slideshow

You can use the edit controls to the right of each slide (in the list of slides) to rename it (📝), remove it from the list (❌), or drag it around the list (☰). This drag handle behaves in the same way as drag handles in the favourites menu, which are described above - just pick an item up using the handle, drag it around the list, then drop it at the desired position.
Saving a slideshow
See the “Favourites” section in the Overview above for details about saving slideshows.
Orbitview
This page is a fullscreen panorama viewer. It’s accessible at localhost:800/streetview/orbitview/ in Igloo Core Engine or Chrome, or at the same port/page on mobile devices, using the media server’s local IP (e.g. http://10.0.0.1:800/streetview/orbitview/).
Its intended use is for things like displaying a non-360 Street View window on one wall of an Immersive Room, but can be used for anything where you want to see non-360 Street View content.
There aren’t any additional controls on the orbitview page - but, like all the other pages, it can be used for navigation - any movements will synchronise with all other connected pages.
Orbitview’s camera orientation can be remotely controlled from the Control page - see the section on the Settings menu in the Overview above. Any camera changes made on the Control page can be copied on any connected Orbitview pages.
Mapview
This page is a fullscreen map viewer. It’s accessible at http://localhost:800/streetview/mapview in Igloo Web or Chrome, or at the same port/page on mobile devices, using the media server’s local IP (e.g. http://10.0.0.1:800/streetview/mapview).
You can use it anywhere you want to see a map without this map being attached to the Control page - e.g. one wall of an Immersive Room or something similar.
It can also be used a slightly lighter-weight control page, as it can be clicked to change the current panorama in exactly the same way as the map on the bottom half of the Control page, and synchronises with other pages as you’d expect. It otherwise behaves exactly like a standard Google Map.
All map filters and styles applied using the Filters menu on the control page are synchronised with any connected Mapview pages. These changes are persistent, so if you just want to use Mapview as a standalone page, you only need to adjust the required styling once on the control page. See the Filters menu section of the Overview above for more info.