
The Overlap Wizard provides a guided way to calculate the correct canvas proportions and projector overlap settings for multi projector screens.
Navigate to Config > Overlap Wizard from the main toolbar
Before you begin
Before starting, make sure you’ve:
-
Completed a basic keystone alignment so the overlap width is consistent from top to bottom.
-
Physically marked the start, midpoint, and end of each overlap zone on the top and bottom of the screen surface.
Where possible, keep the spacing and overlap widths uniform across all projector pairs, this produces cleaner blends and simplifies setup.
Step 1 - Screen and Projector Basics
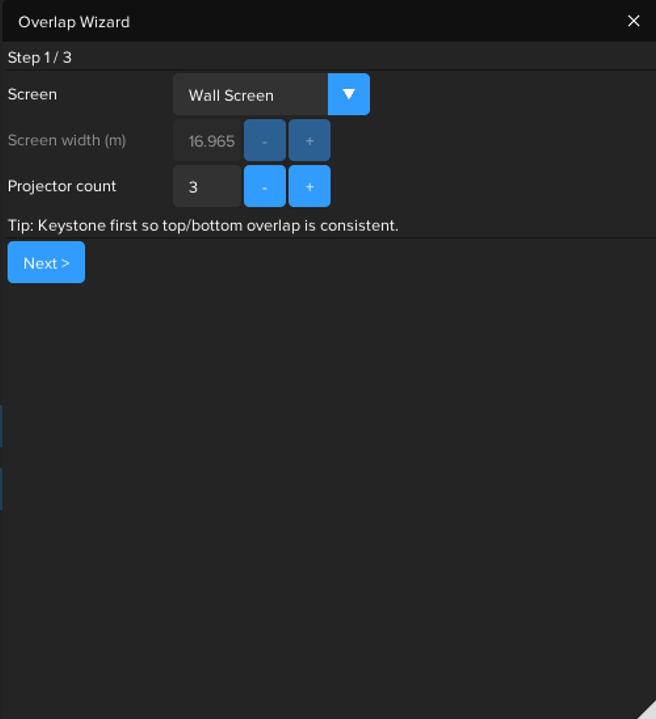
In this step, you’ll confirm which screen section you are configuring and how many projectors are used to cover it.
Each screen section, such as an individual wall section of a cube or a partial cylinder section, must be set up individually using the wizard.
The wizard does not currently support full 360° cylindrical screens
|
Setting |
Description |
|---|---|
|
Screen |
Select the screen section you’re setting up from the list of predefined screens in your project. Each section should be calibrated separately. |
|
Screen width (m) |
The total physical length of the screen section. This is filled automatically from your screen model. For a cylinder screen section this shows the arc length. |
|
Projector count |
The number of projectors used to cover the chosen screen section |
Step 2 - Midpoints (Canvas Subdivision)
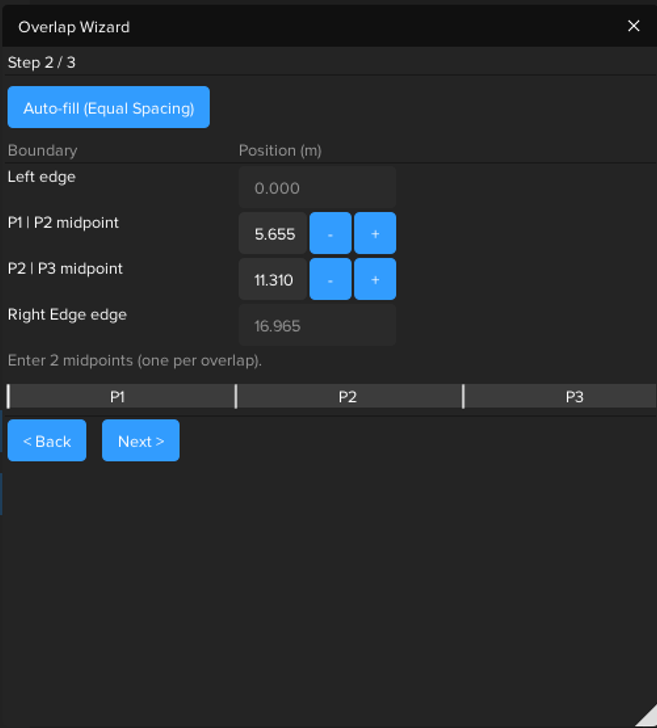
In this step you’ll define the midpoints between projectors i.e. the central points of the overlap zones.
These define how the screen width is split into canvas regions before any overlap is applied.
The number of overlap zones (and therefore midpoints) is always one less than the number of projectors. For example, three projectors will have two overlaps and two midpoint measurements.
|
Boundary |
Position (m) |
|---|---|
|
Left edge |
Always 0 m (fixed) |
|
P1 ↔ P2 midpoint |
Distance from left edge to the midpoint of the first overlap |
|
P2 ↔ P3 midpoint |
Distance from left edge to the midpoint of the second overlap |
|
Right edge |
Automatically equals the total screen length |
You can either:
-
Enter your measured midpoint distances manually, or
-
Click Auto-fill (Equal Spacing) to evenly distribute them.
The ruler preview below shows the relative positions and labels (P1, P2, P3, P….) for a quick visual check.
Step 3 - Overlap Widths

Here you’ll define how wide the overlap zones are for each projector pair.
Overlap Mode
Select how you want to specify overlaps:
-
Fixed width (metres) - all overlaps share the same physical width.
(Default and most common.) -
Fixed percentage of total - each overlap is a set fraction of the total screen width. The equivalent width in metres is displayed beside the slider.
-
Manual (start & end) — enter the start and end measurements for each overlap individually.
Tips
-
Keep overlap widths consistent across all seams where possible.
-
Avoid very large overlaps or very small overlaps
-
Use Manual mode only when physical constraints prevent uniform spacing.
When satisfied, click Apply to apply the calculated regions and projector overlap setting or Copy settings to clipboard for manual entry.