
WebViews are a powerful layer type, allowing you to display any web page or web-based content onto the Igloo Core Engine canvas.
Creating a new WebView
Press the Add Content button and select WebView.
A new layer is added to the top of the layer list with type WebView. This is an embedded web browser and, as shown in the layer properties, defaults to the URL - https://www.igloovision.com.
You can change the layer to point to another website by editing the URL field. For instance, change this to https://www.google.com . You can also change the position of the layer on the canvas by selecting it in the Canvas preview with the left mouse button and using a click-drag action. Drag the WebView to the left side of the canvas.
Next, let’s add another new WebView using the File > New > Layer > WebView menu option and change the URL to https://www.microsoft.com . Drag the WebView to the right side of the canvas. Also try scaling the WebView using the Scale slider in the Geometry tab of the layer properties.
See the Layer Settings reference documentation for more information
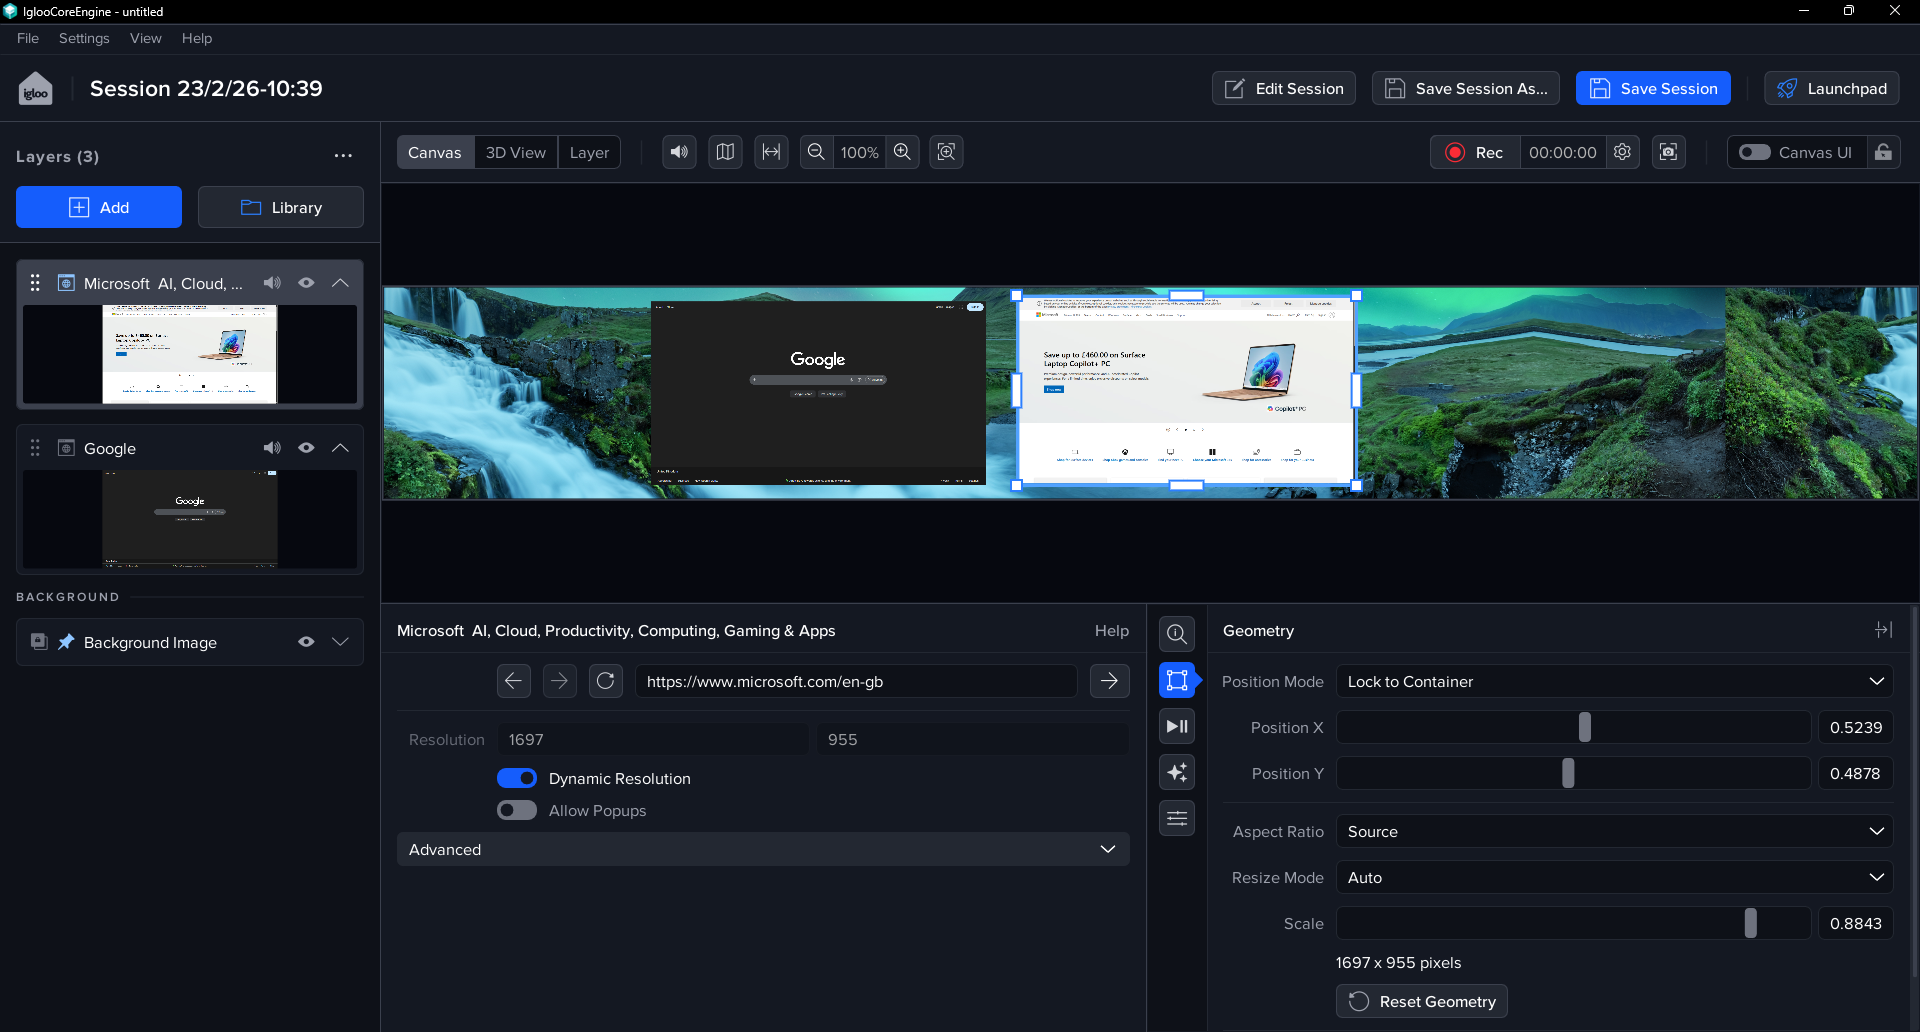
All content exists in Igloo Core Engine as a Layer. Layers have common properties such as size and position, and type specific properties such as a filepath for an image or video and a URL for a WebView.
Saving Layers to a Session
When you have your two new WebViews scaled and positioned as you want them, you can save them to a session.
Before saving, feel free to edit the name of the current Session, either via the ‘Edit Session' button, or by clicking the Session name on the left of the header. For now we can save this as ‘Webview Session’ for easy reference.
Once you have set a Session name, press the ‘Save Session’ button or select File > Save Session. A toast popup will appear in the bottom left of the screen to confirm that your Session was saved.

Loading a Session
To test loading the session you have just saved, first of all remove the WebView layers from the layer list. This can be done by right-clicking a Layer (either in the Layer List panel or in the Canvas preview area), and selecting ‘Delete’.
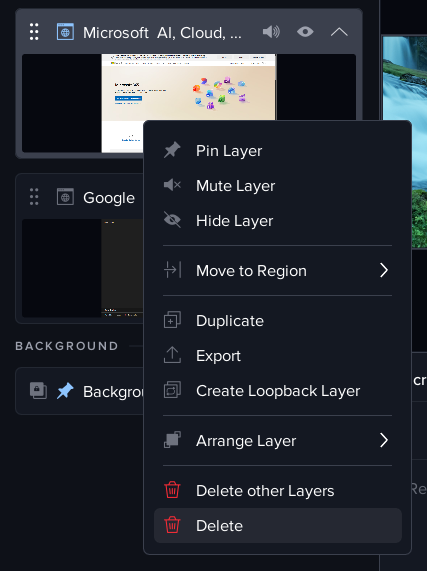
The alternate ‘Delete other Layers’ option is a useful option removing multiple layers at once, whilst preserving a single layer.
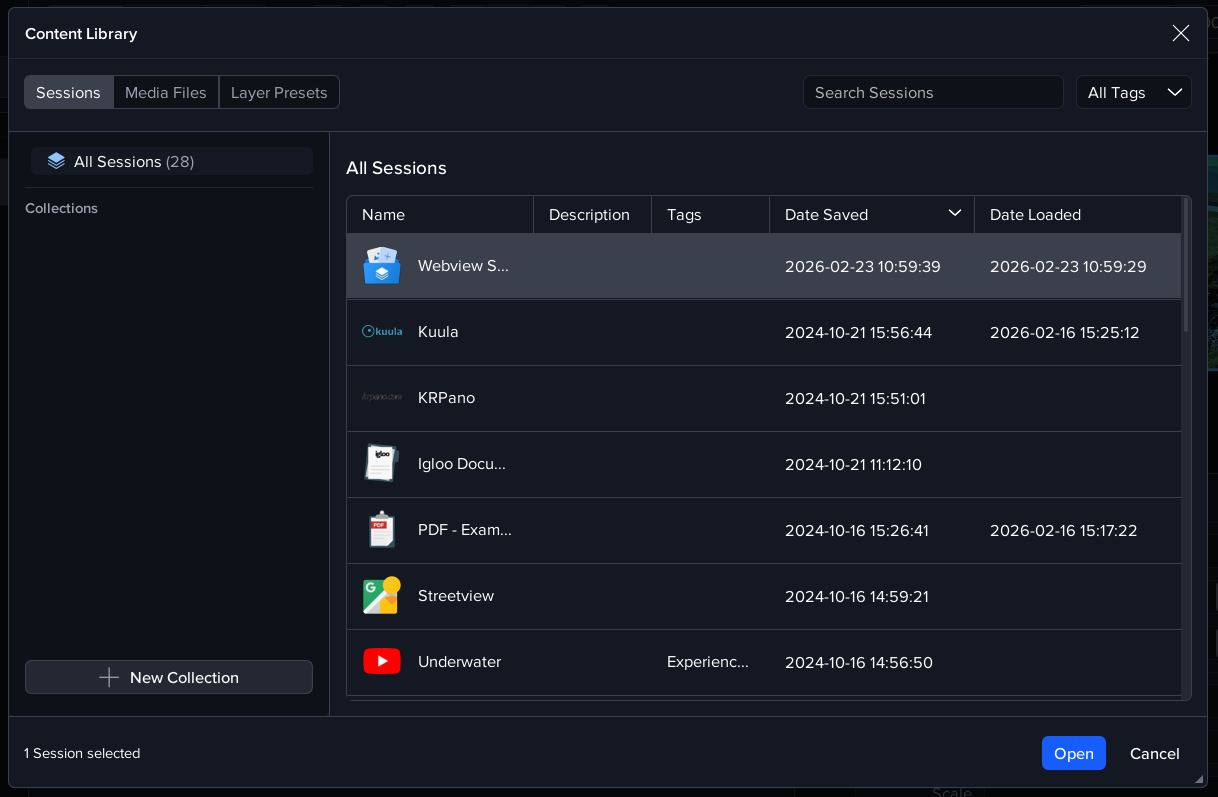
Once the WebViews are removed, press the 'Library' button to open the Content Library window, which will be comprised of 3 tabs: Sessions, Media Files and Layer Presets. On the Sessions tab, select your previously saved Session and press Open. This will load the WebViews back into the layer list and display them on the canvas.
See the WebView reference documentation for more information
Next Section: Desktop UI - Building a Homescreen, part 1